Cast-Iron Pan Pizza: Crisp Edges, Airy Centre
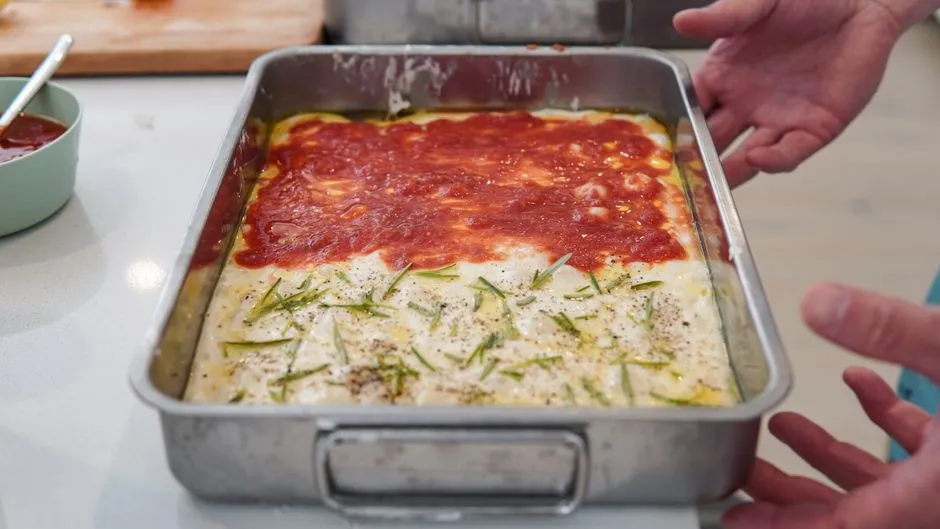
- The short version: oil, time, and a properly hot oven
- Ingredients for one 10-inch pizza
- Mix the dough without making a project of it
- Oil the skillet and let the dough relax
- Heat the oven before topping
- Build a crisp cheese edge
- Bake until the underside has an opinion
- Release it before steam softens the crust
- Same-day schedule when tomorrow forgot to plan
- Sensible variations
- Store and reheat it safely
The short version: oil, time, and a properly hot oven
This cast-iron pan pizza uses a 70% hydration dough, a 10-inch skillet, and enough olive oil to crisp the base without turning dinner into deep-fried theatre. Mix the dough the day before, let it cold-ferment, proof it in the pan, then bake it low in a thoroughly heated 475°F (about 245°C) oven.
The finished pizza has a browned, almost lacy cheese edge, an airy middle, and a base sturdy enough to lift without folding like a wet map. The trick is restraint. A pan pizza can carry more topping than a whisper-thin crust, but it is not a storage unit.
This recipe makes one thick 10-inch pizza, enough for two hungry people or three people with a salad and unusually civil sharing skills.
Ingredients for one 10-inch pizza
Dough
| Ingredient | Weight | Baker's percentage |
|---|---|---|
| Bread flour | 300 g | 100% |
| Cool water | 210 g | 70% |
| Fine salt | 6 g | 2% |
| Instant yeast | 1 g | 0.33% |
| Olive oil | 9 g | 3% |
The dough weighs 526 grams. The 18 grams of pan oil below is separate; it does not count as dough hydration or as part of the dough weight.
Pan and topping
| Ingredient | Weight | Useful equivalent |
|---|---|---|
| Olive oil for skillet | 18 g | About 1 1/2 tablespoons |
| Thick pizza sauce, cooled | 120 g | About 1/2 cup |
| Low-moisture whole-milk mozzarella, grated | 170 g | About 6 ounces |
| Finely grated Parmesan | 15 g | About 1/2 ounce |
| Cooked, drained toppings, optional | Up to 100 g | Keep them scattered |
Bread flour gives the tall crumb more support than a soft cake flour would. All-purpose flour can work, but it may feel looser and bake a little less chewy. Do not quietly add a fistful of flour because the dough is sticky; sticky is part of the arrangement.
Use low-moisture mozzarella for predictable browning. Fresh mozzarella can bring more water than the crust wants, so drain and blot it well and use it in small patches.
Mix the dough without making a project of it
Put the water in a medium bowl. Add the instant yeast, flour, salt, and 9 grams olive oil. Stir with a sturdy spoon or damp hand until no dry flour remains. The mixture will look rough and tacky. That is dough, not an emergency.
Cover and rest for 20 minutes. With a wet hand, reach under one side, stretch it gently, and fold it over the centre. Turn the bowl and repeat three more times. Rest 15 minutes, then complete one more round of four folds. The dough should become smoother and hold itself together, though it will still cling.
Cover tightly and refrigerate for 12–48 hours. The longer window develops more flavour, while the short end still makes a fine pizza. Your refrigerator temperature and yeast activity affect the pace. If the dough is dramatically inflated and threatening annexation before 48 hours, use it sooner.
Flour is a raw food. Do not taste the unbaked dough, and wash hands, bowls, utensils, and work surfaces after they contact it.
Oil the skillet and let the dough relax
About three hours before baking, coat the bottom and lower sides of a clean 10-inch cast-iron skillet with all 18 grams of olive oil. Tip the cold dough into the centre and turn it once so both sides pick up oil.
Press gently toward the edge with oiled fingertips. It will probably spring back. Stop wrestling it, cover the pan, and wait 20 minutes. Press again. Two calm rounds usually reach the rim more effectively than one furious round, and the dough has no feelings to hurt but your knuckles do.
Cover the skillet and proof at room temperature for 2–3 hours, until the dough looks expanded, relaxed, and visibly bubbly around the edge. A cool kitchen may need longer; a hot one may move faster. Do not rely on the clock alone. Underproofed dough stays tight and dense, while severely overproofed dough can collapse beneath toppings.
Heat the oven before topping
Set a rack in the lower third of the oven. Preheat to 475°F (about 245°C) for at least 45 minutes. If you have an oven thermometer, use it; many ovens announce a temperature before the walls, rack, and air have genuinely settled there.
This method does not preheat the skillet. The dough proofs safely in the room-temperature pan, then the cast iron gathers heat in the oven. Do not move this soft dough into a scorching skillet unless you are following a different method built around that manoeuvre.
While the oven heats, prepare toppings. Roast or sauté mushrooms, spinach, peppers, and other watery vegetables, then cool and drain them. Cook raw sausage before topping: ground pork or beef sausage must reach 160°F (71°C), and poultry sausage must reach 165°F (74°C). Drain excess fat. The pizza oven is not the place to discover whether a thick nugget of raw meat got the memo.
Build a crisp cheese edge
Uncover the proofed dough. If one large bubble looks ready to become its own postcode, pop only that bubble with an oiled fingertip. Leave the smaller ones alone.
Scatter the mozzarella all the way to the skillet wall. Cheese touching the oiled iron creates the crisp, browned rim. Add the Parmesan. Spoon the sauce over the cheese in small stripes or patches rather than spreading a wet blanket across the dough. Scatter up to 100 grams of cooked, drained topping, leaving visible gaps.
Cheese first is deliberate here. It creates a modest moisture barrier and lets the sauce remain bright on top. It is not a constitutional requirement for every pizza style.
Bake until the underside has an opinion
Wear proper oven gloves; a cast-iron handle becomes as hot as the pan and remains hot after baking. Place the skillet on the lower rack and bake for 15–20 minutes. Begin checking at 15 minutes.
Look for three signals together:
- the cheese edge is deeply browned, not merely beige;
- the centre crust looks set rather than glossy or gummy around a lifted topping;
- a thin spatula can raise the edge enough to reveal a crisp, medium-to-deep golden underside.
If the top is ready but the base is pale, set the skillet over medium heat on the stovetop for 1–2 minutes. Stay beside it and check every 20–30 seconds; cast iron can move from helpful to charcoal with impressive efficiency. This stovetop finish is appropriate for bare cast iron on a compatible hob. Follow the manufacturer’s directions for enamelled cookware and glass or induction surfaces.
If the base is darkening before the centre sets, move the pan one rack higher and reduce the oven to 450°F (230°C) for the remaining minutes. Next time, use a slightly lighter pan, a higher rack, or fewer toppings.
Release it before steam softens the crust
Rest the pizza in the pan for two minutes. Run a thin spatula around the rim, checking that no cheese has welded itself to a dry spot. Lift or slide the pizza onto a wire rack. Let it stand there for three more minutes before moving it to a board and cutting.
Leaving the whole pizza in the hot skillet traps steam beneath the base. Cutting immediately releases steam through the crumb and can make the centre look underdone even when it was nearly there. Five minutes is a small price for a cleaner slice; you have already waited since yesterday.
For more diagnostic detail, see the eight causes of soggy pan pizza. If the ratio itself is what interests you, pan-pizza hydration math shows every calculation rather than waving vaguely at “a wet dough.”
Same-day schedule when tomorrow forgot to plan
Use the same ingredient weights. Mix and fold the dough, then cover it at room temperature until it has clearly expanded by roughly half and shows bubbles, commonly 2–4 hours. Transfer it to the oiled skillet and proof another 1–2 hours until relaxed and airy. Room and dough temperature control those times.
Do not add extra yeast unless you have tested the change. One gram is enough to ferment this modest batch on a warm same-day schedule, and excessive yeast can race ahead of flavour and structure. Cold fermentation is more forgiving, but same-day pizza is still pizza, which is a strong consolation prize.
Sensible variations
For pepperoni, use 50–70 grams and tuck some slices under the cheese while leaving others on top. For mushroom and onion, sauté both until their released liquid evaporates, cool them, and use no more than 100 grams combined. For a plain cheese pizza, simply omit optional toppings; nothing is missing.
Garlic can burn against exposed iron. Mix finely grated garlic into the sauce or brush a little garlic oil onto the baked rim instead. Very sugary sauces also scorch readily at the edge, so use a balanced, thick sauce rather than a sweet glaze.
Want more acreage? The half-sheet pan pizza recipe uses its own dough mass and topping load. Do not simply double this batch for every larger pan. A 12-inch round skillet has 1.44 times—not twice—the surface area of a 10-inch skillet.
Store and reheat it safely
Remove leftovers from the cast iron and refrigerate them within two hours of serving, or within one hour if the surrounding temperature is above 90°F (32°C). Store covered and use within 3–4 days. Reheat leftovers to 165°F (74°C).
For a crisp base, warm slices in a dry skillet over moderate heat, covering only briefly to heat the centre, or place them on a preheated tray in a 375°F (190°C) oven. Time depends on slice thickness and refrigerator temperature, so verify the centre rather than appointing six minutes king of all leftovers.
The pan may be heavy, the proof may test your patience, and the cheese edge may inspire territorial behaviour. That is the entire point.